Out of all the pampering that can be done my biggest concern when it comes to myself is nail care. It's a very rare occasion that my nails aren't freshly painted. Once my polish starts chipping it's time to redo them. I'm not an expert by any means but when I got an email from
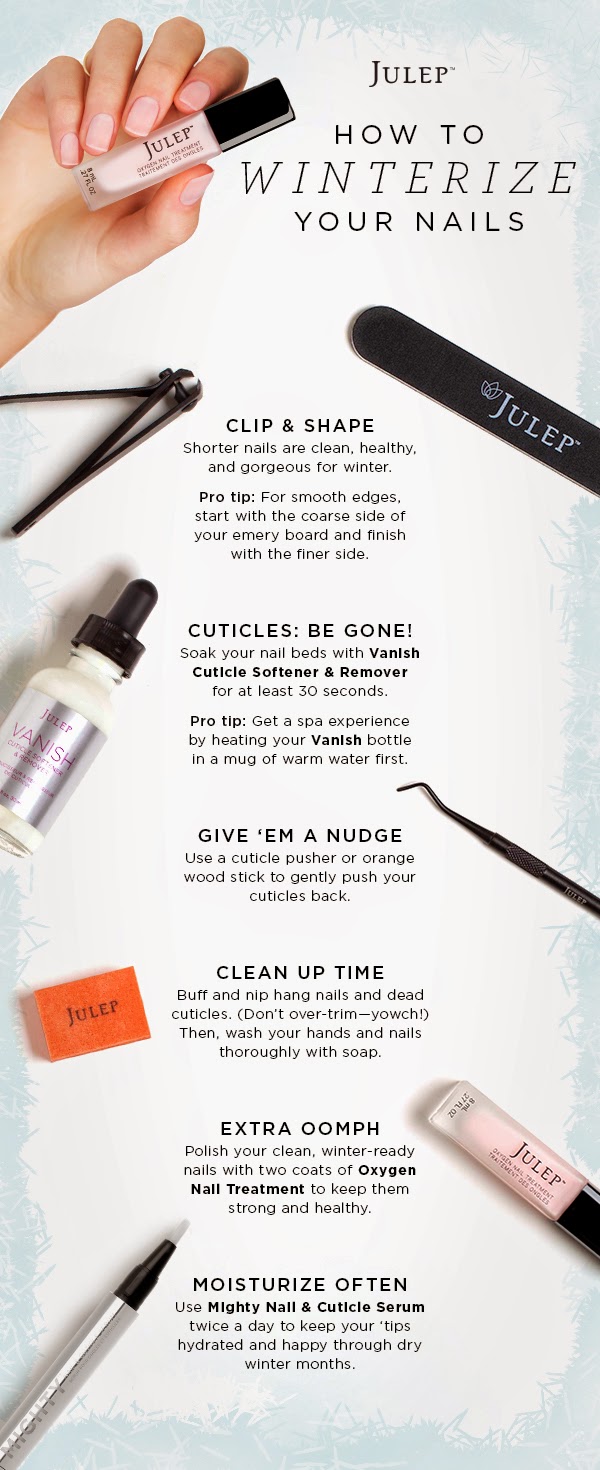
Julep to share my tips for winterizing your nails I thought it sounded like a pretty fun post. They sent over some of their tips for me to share and I have a few of my own to add. So, I'll show you my go to nail routine and then share their little infographic for a few extra tips that I don't usually do myself (even though I should).
I usually paint my nails while we are watching tv so first things first, gather all your supplies and find something to watch on Netflix. Gilmore Girls is my go-to right now unless my husband is home and then we usually watch something else.
Step 1: Remove old nail polish. I use non-acetone nail polish remover usually. There are sometimes when I do use acetone nail polish remover simply because it works a lot easier/faster for glitter polishes or really dark colors that are hard to remove completely.
Step 2: Filing. I don't usually clip my nails unless they get way out of control but I like to keep them a little longer so I just file them down a bit and shape them up. I also use a 4-way buffer to buff out any ridges.
Step 3: Sometimes I will use
OPI Avoplex Cuticle Oil especially in the winter. It works really well to help moisturize dry cuticles. I even make my husband use it sometimes. I just put it on and wait for it to dry completely and then I wash my hands and continue. It doesn't take too long for it to dry all the way, maybe 10 minutes.
Step 4: Wash your hands so the polish will adhere to the nails better. Lotion and cuticle oils will prevent your polish from sticking as well and it will chip a lot faster.
Step 6: Polish. This time I'm using
Essie Armed & Ready. It says it's an army green & pearl color but it comes off grayish with a hint of gold to me. I usually do 2 coats of any polish just to be safe.
I do have a few Julep polishes that you can get
here and they work really well but all the colors I have are super bright and summery. I do recommend them though! They go on really well and aren't super sheer. A couple coats and you're good to go.
Step 7: Top coat. My favorite top coat is
Beauty Secrets Top Coat from Sally's. I have been wanting to try a China Glaze top coat and I'm almost out so I might have to try it next time.

Step 8: Drying and lotion. I usually make sure I paint my nails with plenty of time before I need to do anything so they can dry properly because I tend to forget that they are freshly painted and mess them up. Once they are completely dry after at least 30 minutes to an hour I apply some hand lotion since I just used nail polish remover and such plus it's just a good idea to keep your hands moisturized. My husband is the worst when it comes to using lotion so his hands get super red and dry in the winter and hurt so I make sure to keep mine well moisturized so I don't have to go through that. My absolute favorite hand lotion is
Lollia Hand Cream IN LOVE. It smells amazing! It has hints of rose, apple blossoms and jasmine. Seriously, go get some. You'll thank me later. Plus, it makes your skin sooo soft, dries really well and doesn't stay all slimy on your hands. It's the best.


Well, there's my routine. It's not too fancy but it works and it's not too time consuming. Here is the infographic from
Julep. I hope you found this helpful and definitely check out some of the links I included. I have tried a ton of different nail care products and these are by far the best I've tried.


